Intune setup
Depending on what you want to archieve with client certificates there's a few typical steps you want to do.
- Deploy your EasyScep Root Certificate as a trusted CA
- Deploy one or more certificates to your devices for client authentication
- Deploy network connectivity profiles like Wi-Fi, LAN and VPN.
You can see the detailed instructions in this document for each of the use cases.
Documentation here is primarily for Windows 10/11 profiles, but it's almost identical for other platforms.
Configuring Intune
Prerequisites
To start deploying certificates using Microsoft Intune, be sure to check that your EasyScep instance is configured correctly. Check our on-boarding guide here if you have not yet done so yet.
Creating the Root Certificate Trust
First, you need to upload the certificate into Intune and register as trusted.
Note: you should create a trusted profile for every platform you are using.
-
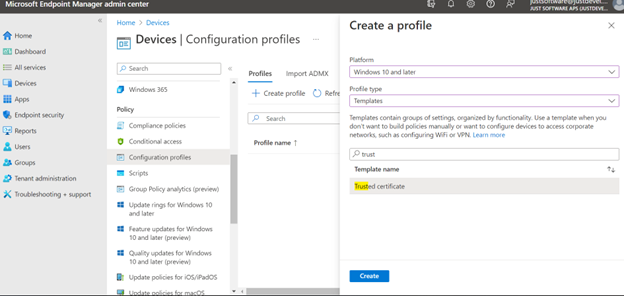
Go to https://endpoint.microsoft.com/ > Devices > Configuration profiles and click on “Create profile”.
-
On “Create profile” page choose the needed platform. In Profile type select “Templates” and in Template name find “Trusted certificate” and click on “Create”
-
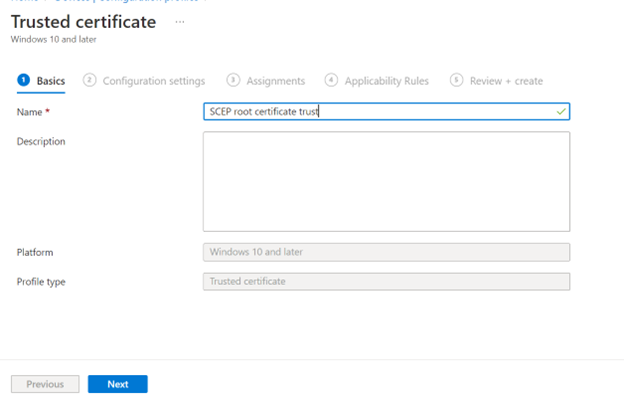
Fill in a name for the trusted certificate profile
-
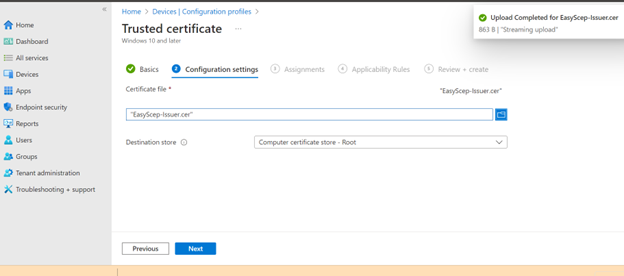
Upload certificate which is downloaded from the EasyScep administration portal.
-
Choose deployment scope, this is often "All users" or "All devices" for a Certificate Authority trust.
Adjust according to your requirements.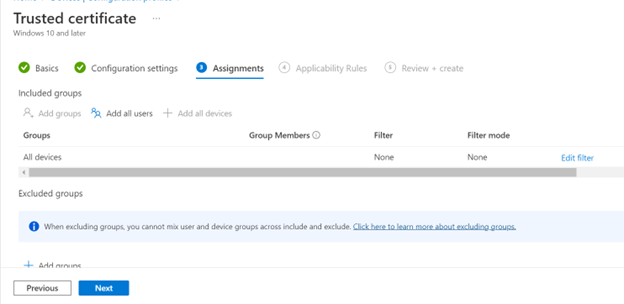
-
Click on “Next” until to get to the last page, where you click on “Create” to save your profile.
Issuing client certificates
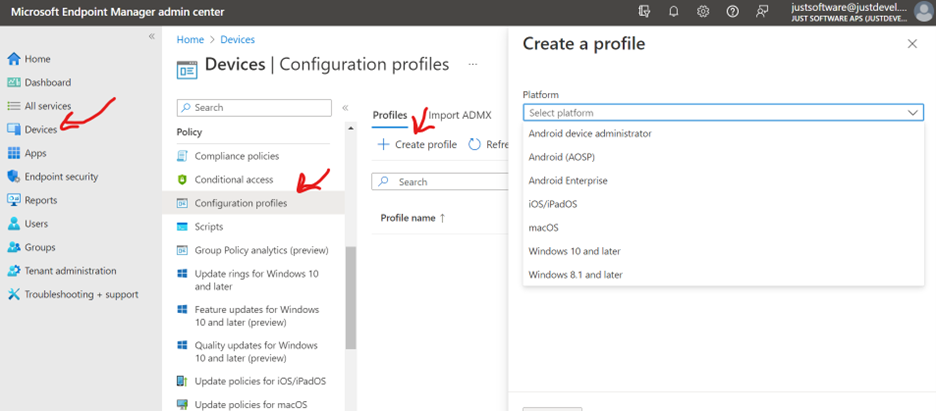
- Go to Intune administration page https://endpoint.microsoft.com/ > Devices > Configuration profiles
-
Click on Create profile
-
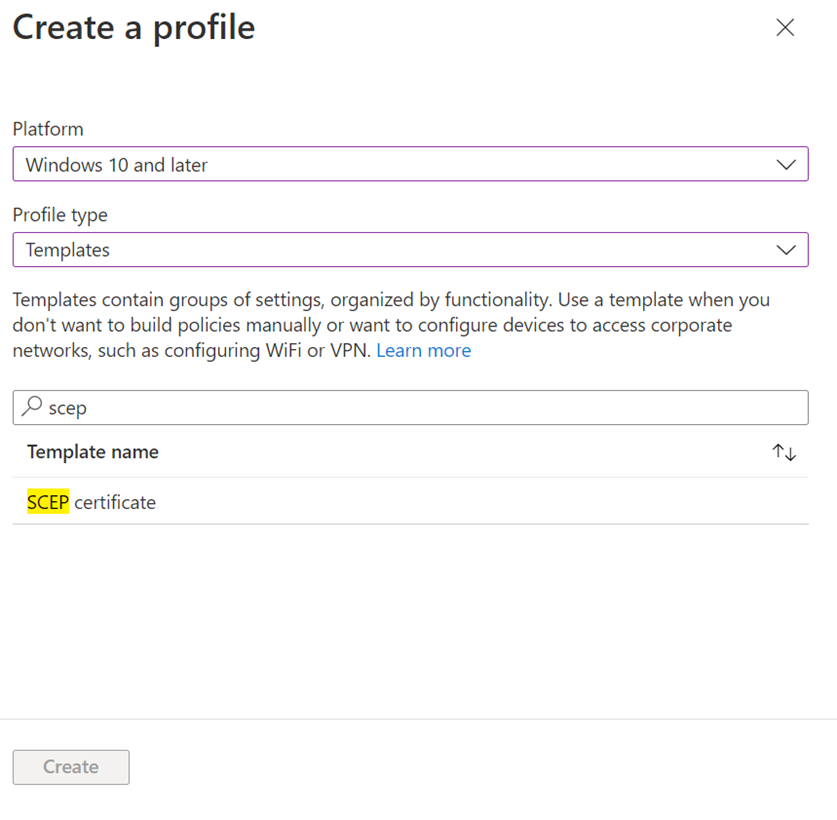
On the Create profile page, choose Template -> SCEP Certificate.
-
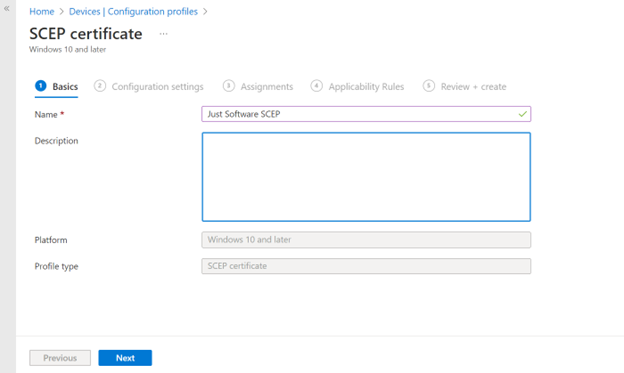
Name your SCEP Profile
-
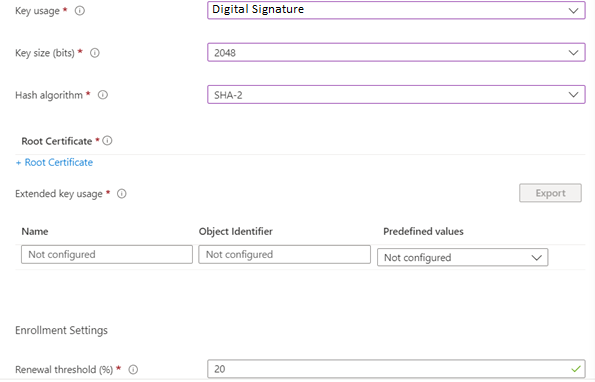
On the Configuration settings tab choose:
| Setting | Value |
|---|---|
| Certificate type | User or Device, for VPN and WiFi usage, device certificates is recommended |
| Subject name format | e.g. "CN={{UserName}},E={{EmailAddress}}" |
| Certificate type | Device |
 For most cases (e.g. WiFi / network access), device certificates are recommended. For most cases (e.g. WiFi / network access), device certificates are recommended. |
|
| Subject name format | CN={{AAD_Device_ID}},OU=Windows,OU=Devices,O=MyOrg Inc,C=US |
| Certificate validity period | 3 months (you can make it 1 month, 1 day, etc. This is a certificate that is issued to the client.) |
| Typical anywhere between 3 months and 1 year. |
|
| Key storage provider (KSP) | Enroll to Trusted Platform Module (TPM) KSP if present, otherwise Software KSP |
 It's recommended to use Software storage on windows for initial testing and deployment since faulty TPM's are often seens and causes hard to troubleshoot errors. It's recommended to use Software storage on windows for initial testing and deployment since faulty TPM's are often seens and causes hard to troubleshoot errors. |
|
| Key usage | Digital Signature |
| Key size (bits) | 2048 (recommended) |
| Hash algorithm | SHA-2 |
| Root Certificate | choose the one added on trusted certificate (in this example it is “SCEP root certificate trust”) |
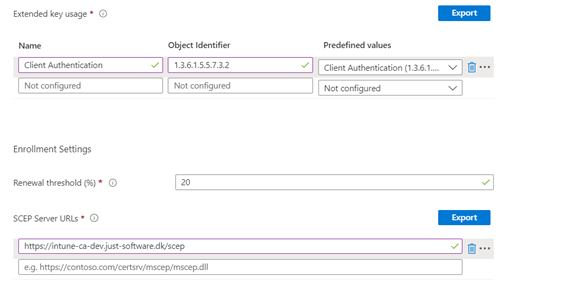
| Extended key usage | Choose in Predefined values “Client Authentication (1.3.6.1.5.5.7.3.2)” |
| SCEP Server URLs | you can find the link(s) in the EasyScep administration portal |

-
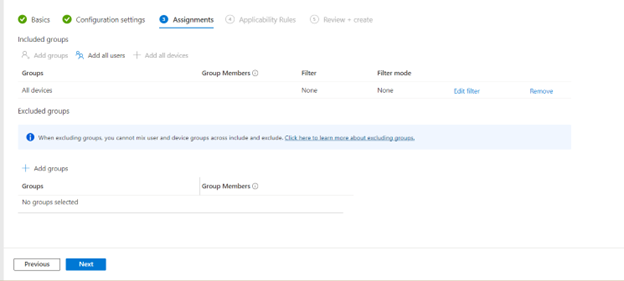
On The Assignments tab ensure you assign the devices which should receive certificates by using a filtered group which contains the users and/or devices you want to deploy SCEP certificates for.
-
Save your profile and validate that it works by forcing sync on a client
Android Enterprise (BYOD Work Profile)
Android Enterprise has two platform-specific requirements that differ from the Windows guidance above. If either is missed, the certificate may enrol successfully but the downstream Wi-Fi / VPN profile will fail to bind — often silently — and the device will not connect. When paired with EasyRadius, the typical symptom is Intune error 0x87d1fde8 (-2016281112) on the Wi-Fi profile. See the EasyRadius Android EAP-TLS troubleshooting guide for the full diagnostic flow.
1. Use a User certificate, not a Device certificate
For a BYOD (personally-owned) Work Profile, the SCEP profile must issue a User certificate. A Device certificate will appear to enrol, but the certificate is placed in a scope the Work Profile network stack cannot bind to, so the Wi-Fi/VPN profile silently fails to apply.
- On the SCEP profile's Configuration settings tab, set Certificate type to User.
- This applies specifically to BYOD Work Profile enrolments. Fully managed / corporate-owned device scenarios differ; when in doubt for personally-owned devices, use User.
2. Include the UPN in the Subject Alternative Name (SAN)
Android validates the certificate's Subject Alternative Name before it applies the Wi-Fi profile. The User Principal Name (UPN) placed in the Common Name (CN) alone is not sufficient — it must be present in the SAN as an otherName entry using the Microsoft UPN OID 1.3.6.1.4.1.311.20.2.3.
In the Intune SCEP profile, configure the SAN as follows:
| Setting | Value |
|---|---|
| Certificate type | User |
| Subject alternative name | Attribute: User principal name (UPN) — Value: {{UserPrincipalName}} |
Intune's User principal name (UPN) SAN attribute is emitted as an otherName with OID 1.3.6.1.4.1.311.20.2.3 — this is exactly what Android expects. |
|
| Extended key usage | Client Authentication (1.3.6.1.5.5.7.3.2) |
A Device certificate, or a User certificate whose UPN is only in the CN, will typically enrol without an obvious error but the Wi-Fi profile will not bind. Always verify the issued certificate on the device (or via the CA) contains the UPN in the SAN before troubleshooting the RADIUS/Wi-Fi side.