Configuring Wi-Fi Profile with EAP-TLS in Intune
To configure a Wi-Fi profile with EAP-TLS certificate authentication in Intune, follow these steps:
Prerequisites
Ensure you have the following:
- A working Intune compatible PKI/certificate infrastructure for your organization. We recommend EasyScep for a plug-n-play SaaS solution.
- A Root CA certificate deployed to devices.
- Client certificates issued to devices.
- Access to the Microsoft Intune administration portal.
If you have already deployed the required certificates then you can skip step 1 and step 2.
Step 1: Deploy the Root CA Certificate
- Go to Microsoft Intune administration portal.
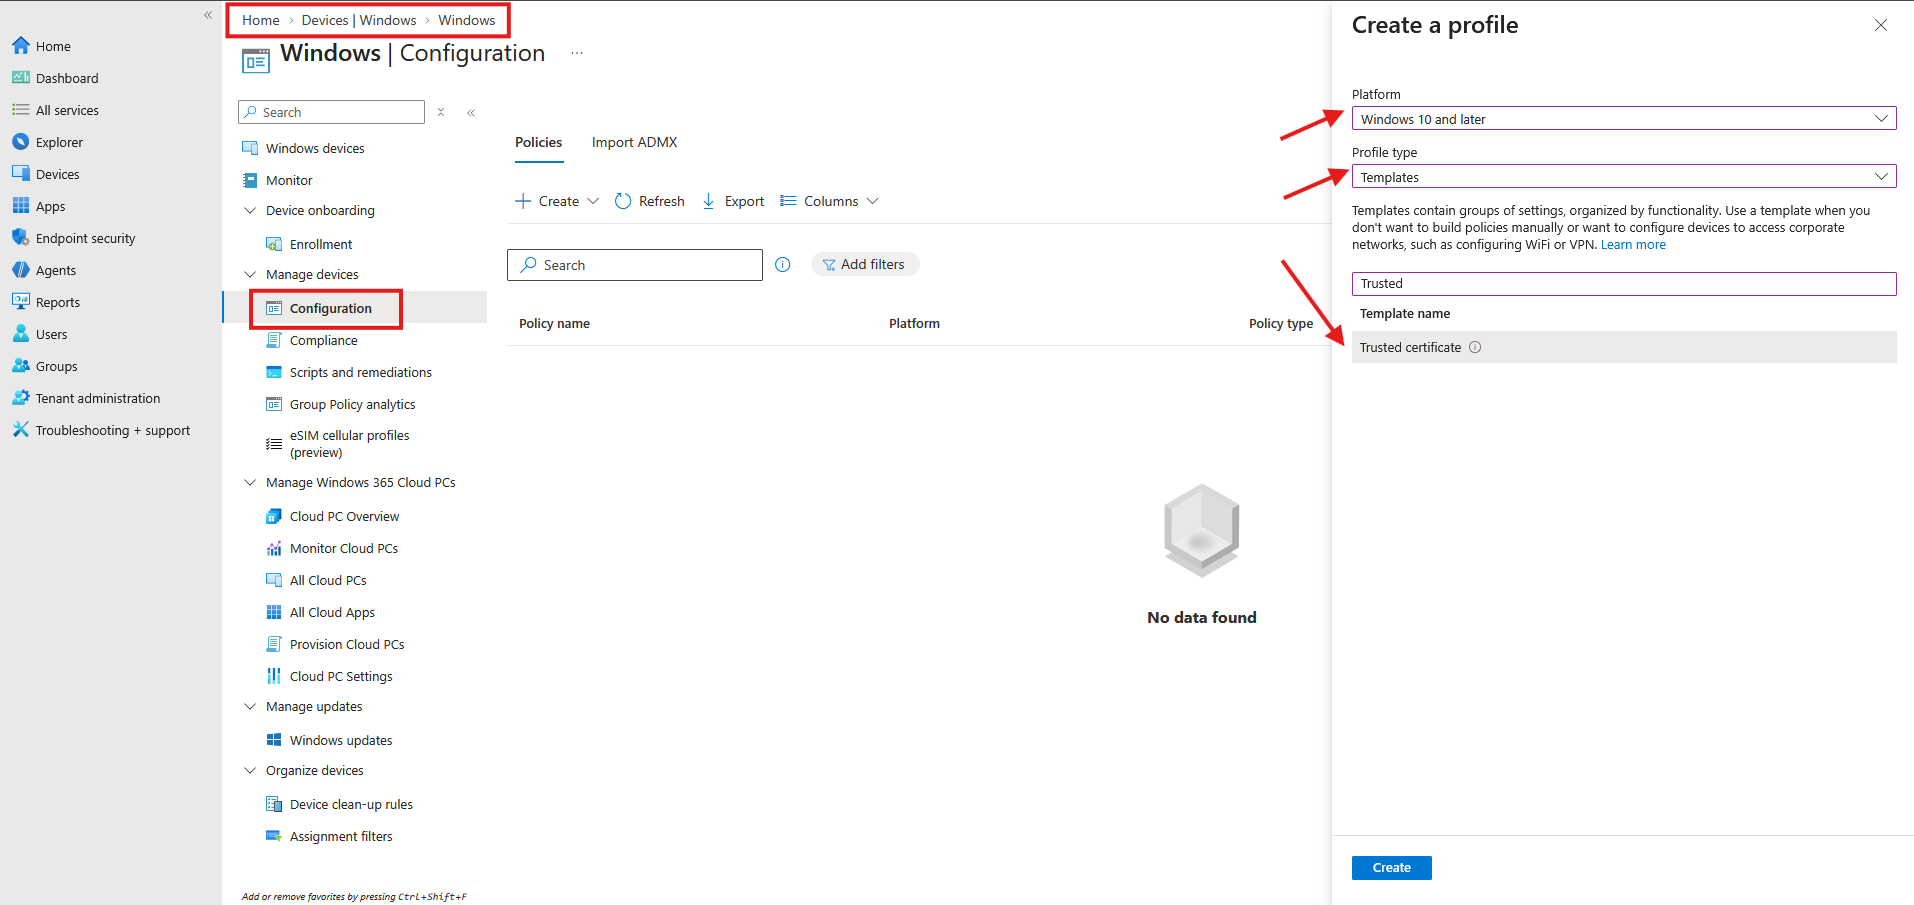
- Navigate to Devices > Configuration, click on Create and then Create Policy.
- Select Windows 10 and later as the platform.
- Choose Templates and select Trusted certificate.
-
Click Create.
-
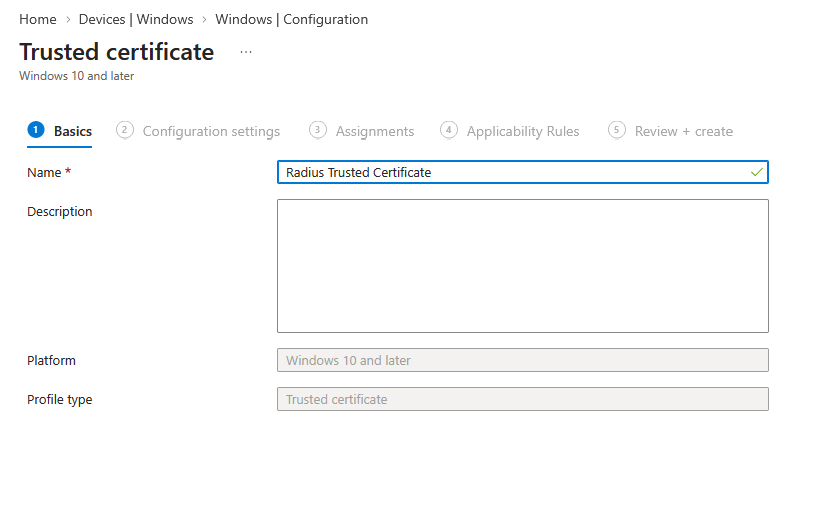
Name the profile and upload the Root CA certificate.
-
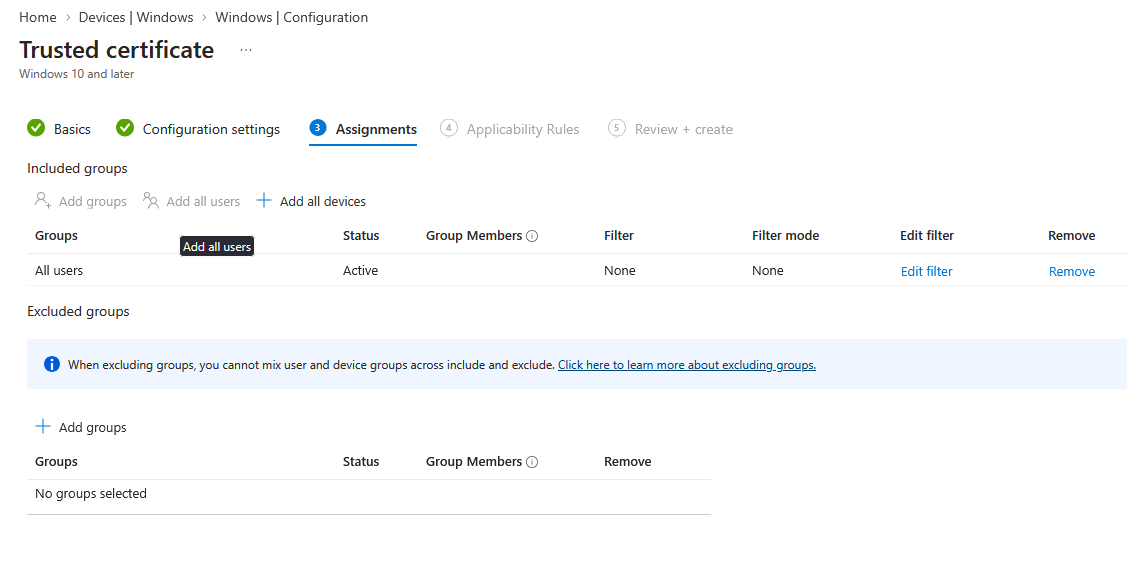
Assign the profile to the required groups.
-
Go to the "Review & Create" page and click Create to save the profile.
Step 2: Issue Client Certificates
- In the Microsoft Endpoint Manager admin center, go to Devices > Configuration.
- Click on Create and then Create policy.
- Select Windows 10 and later as the platform.
- Choose Templates and select SCEP Certificate.
-
Click Create.
-
Name the profile and configure the following settings:
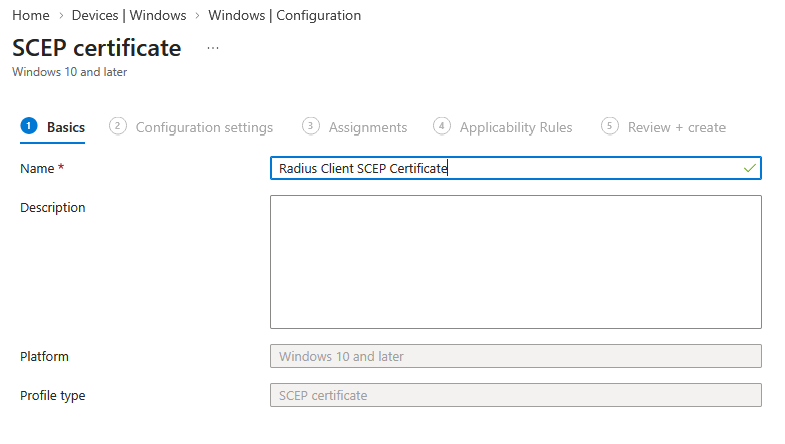
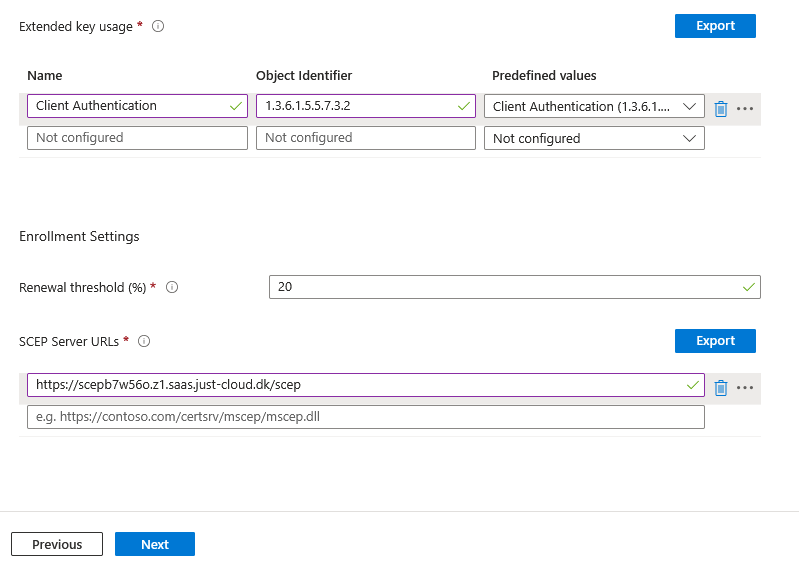
Setting Value Certificate type Device Subject name format CN={{DeviceName}}Subject alternative name Not configured Certificate validity period 1 year Key storage provider (KSP) Enroll to Software KSP Key usage Digital signature Key size (bits) 2048 Hash algorithm SHA-2 Root Certificate Select the trusted certificate profile created earlier (in this example, "Radius Trusted Certificate") Extended key usage Under Predefined values, select "Client Authentication (1.3.6.1.5.5.7.3.2)" Renewal threshold (%) 20 SCEP Server URLs The SCEP URL shown in the EasyScep administration portal, e.g. https://<your-instance>.saas.just-cloud.dk/scep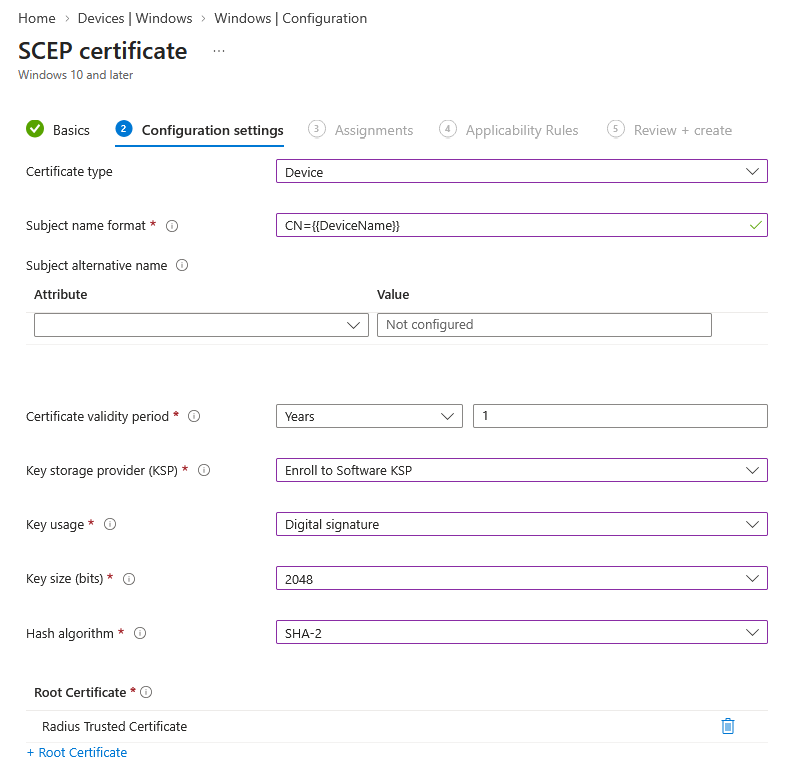
-
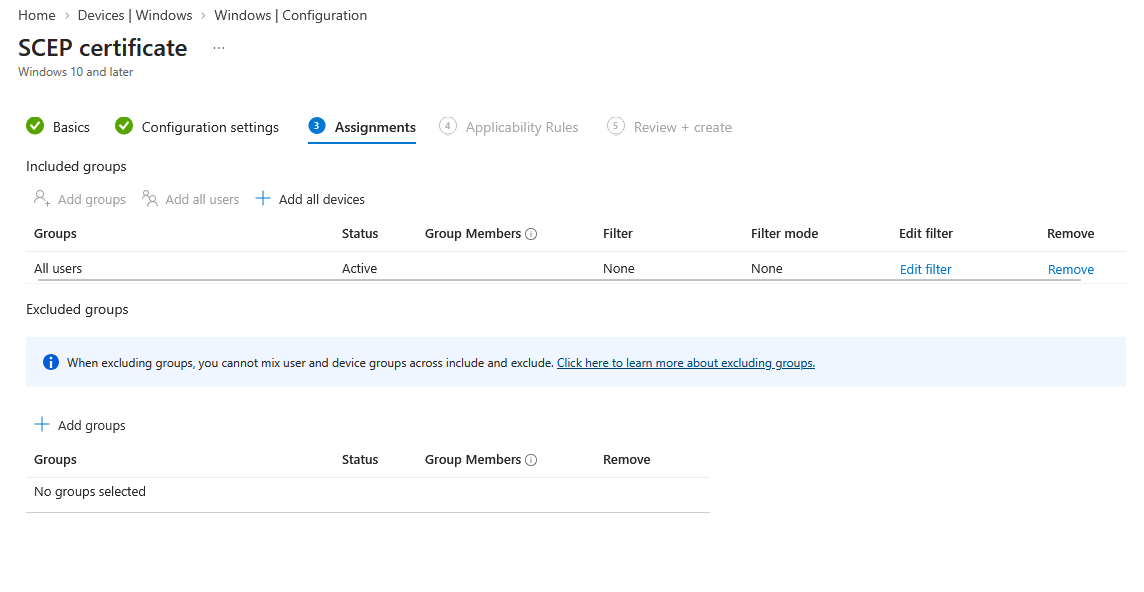
Assign the profile to the required groups.
-
Go to the "Review & Create" page and click Create to save the profile.
Step 3: Configure the Wi-Fi Profile
- In the Microsoft Endpoint Manager admin center, go to Devices > Configuration.
- Click on Create and then Create Policy.
- Select Windows 10 and later as the platform.
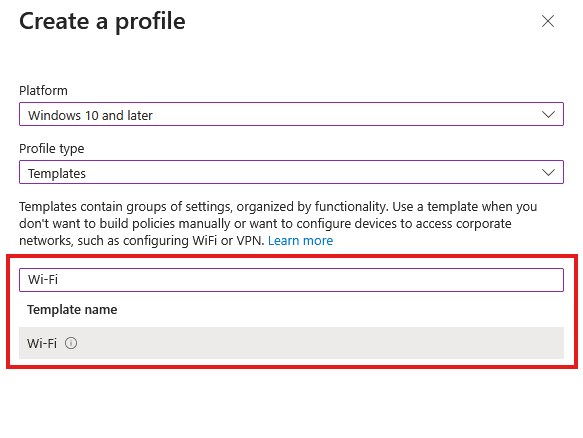
- Choose Templates and select Wi-Fi.
-
Click Create.
-
Name the profile and configure the following settings:
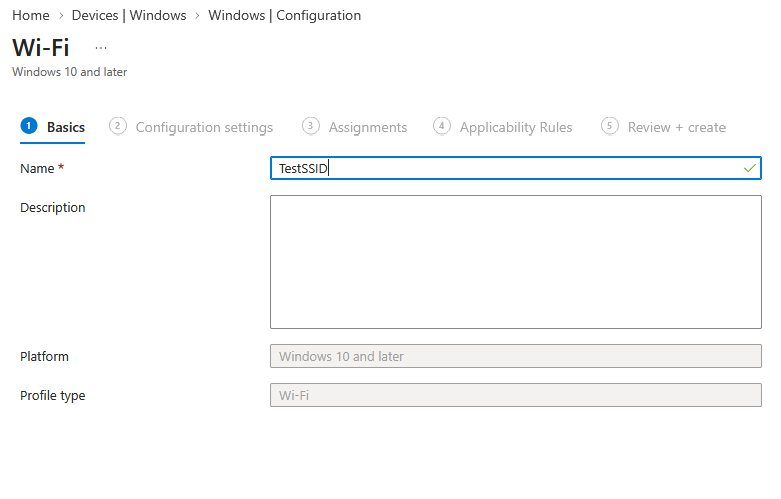
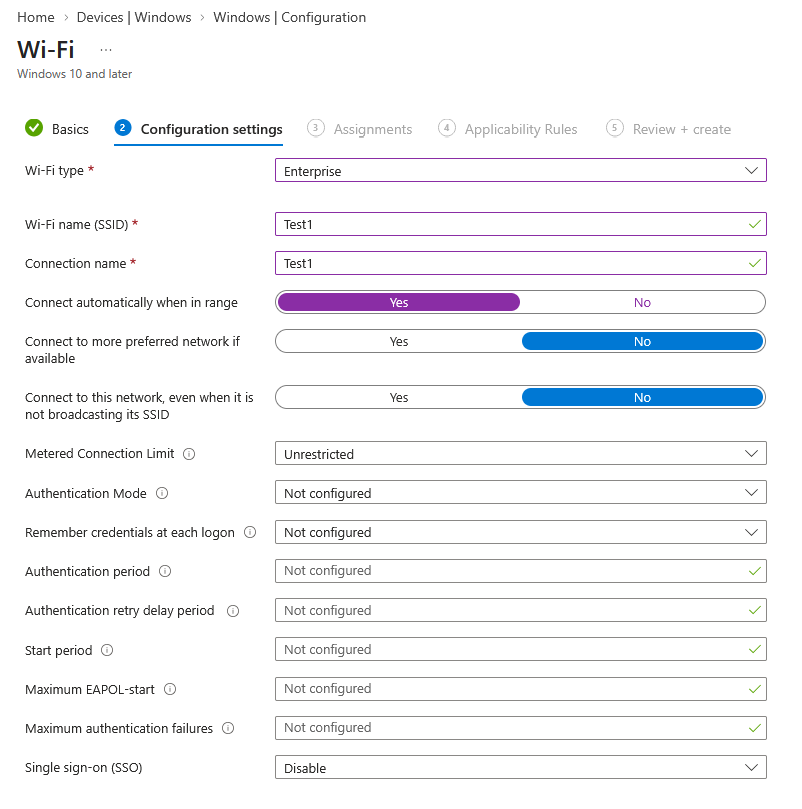
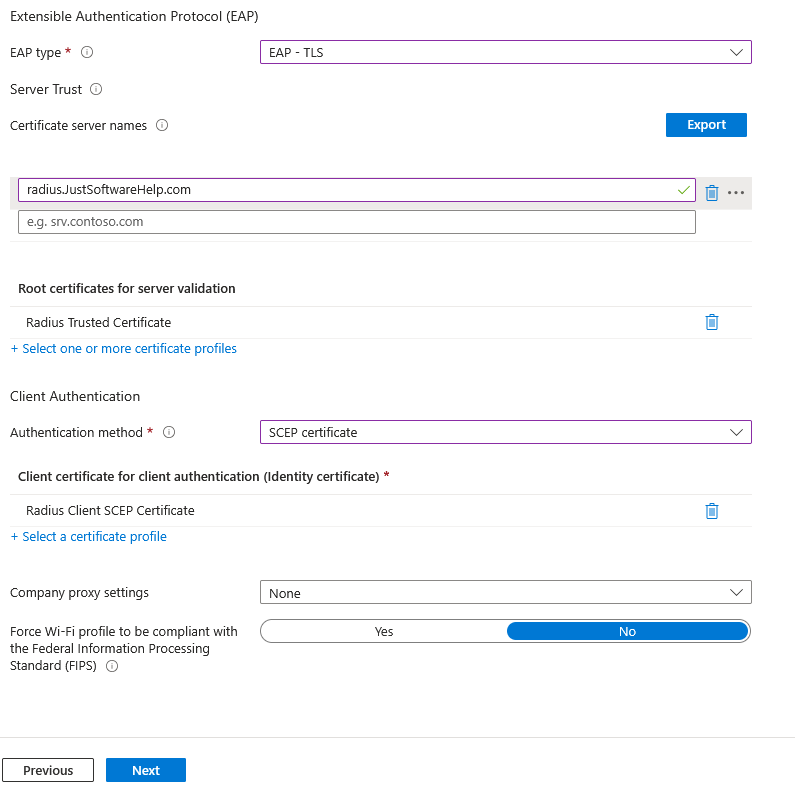
Setting Value Wi-Fi type Enterprise Wi-Fi name (SSID) The SSID of your Wi-Fi network Connection name A name for the connection, typically the same as the SSID Connect automatically when in range Yes EAP type EAP - TLS Certificate server names The hostname of your RADIUS server (in this example, radius.JustSoftwareHelp.com). This must match the custom hostname configured in EasyRadius.Root certificates for server validation Select the trusted certificate profile created earlier (in this example, "Radius Trusted Certificate") Authentication method SCEP certificate Client certificate for client authentication (Identity certificate) Select the SCEP certificate profile created earlier (in this example, "Radius Client SCEP Certificate") All other settings can be left at their default values.
-
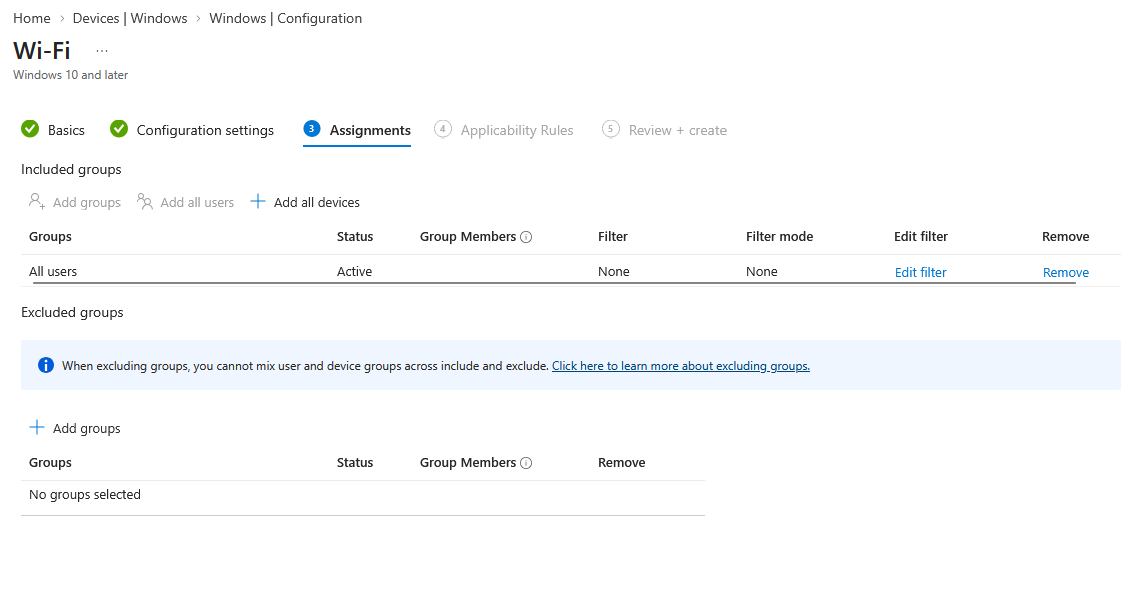
Assign the profile to the required groups.
-
Go to the "Review & Create" and then click Create to save the profile.
Step 4: Validate the Configuration
- Ensure the devices are synced with Intune.
- Verify that the Wi-Fi profile is applied and the device can connect to the Wi-Fi network using EAP-TLS authentication.
By following these steps, you can successfully configure a Wi-Fi profile with EAP-TLS certificate authentication in Intune.