Configuring TP-Link Omada SG2008P for Wired 802.1X with EasyRadius
This guide shows you how to protect the Ethernet ports of a TP-Link Omada SG2008P switch with 802.1X, using EasyRadius as the RADIUS server. Once it's set up, a device plugged into a protected port only gets network access after it authenticates with its certificate.
Prerequisites
Before you begin, make sure you have the following in place:
- Access to the switch's web interface (its local IP address, e.g.
192.168.x.x)
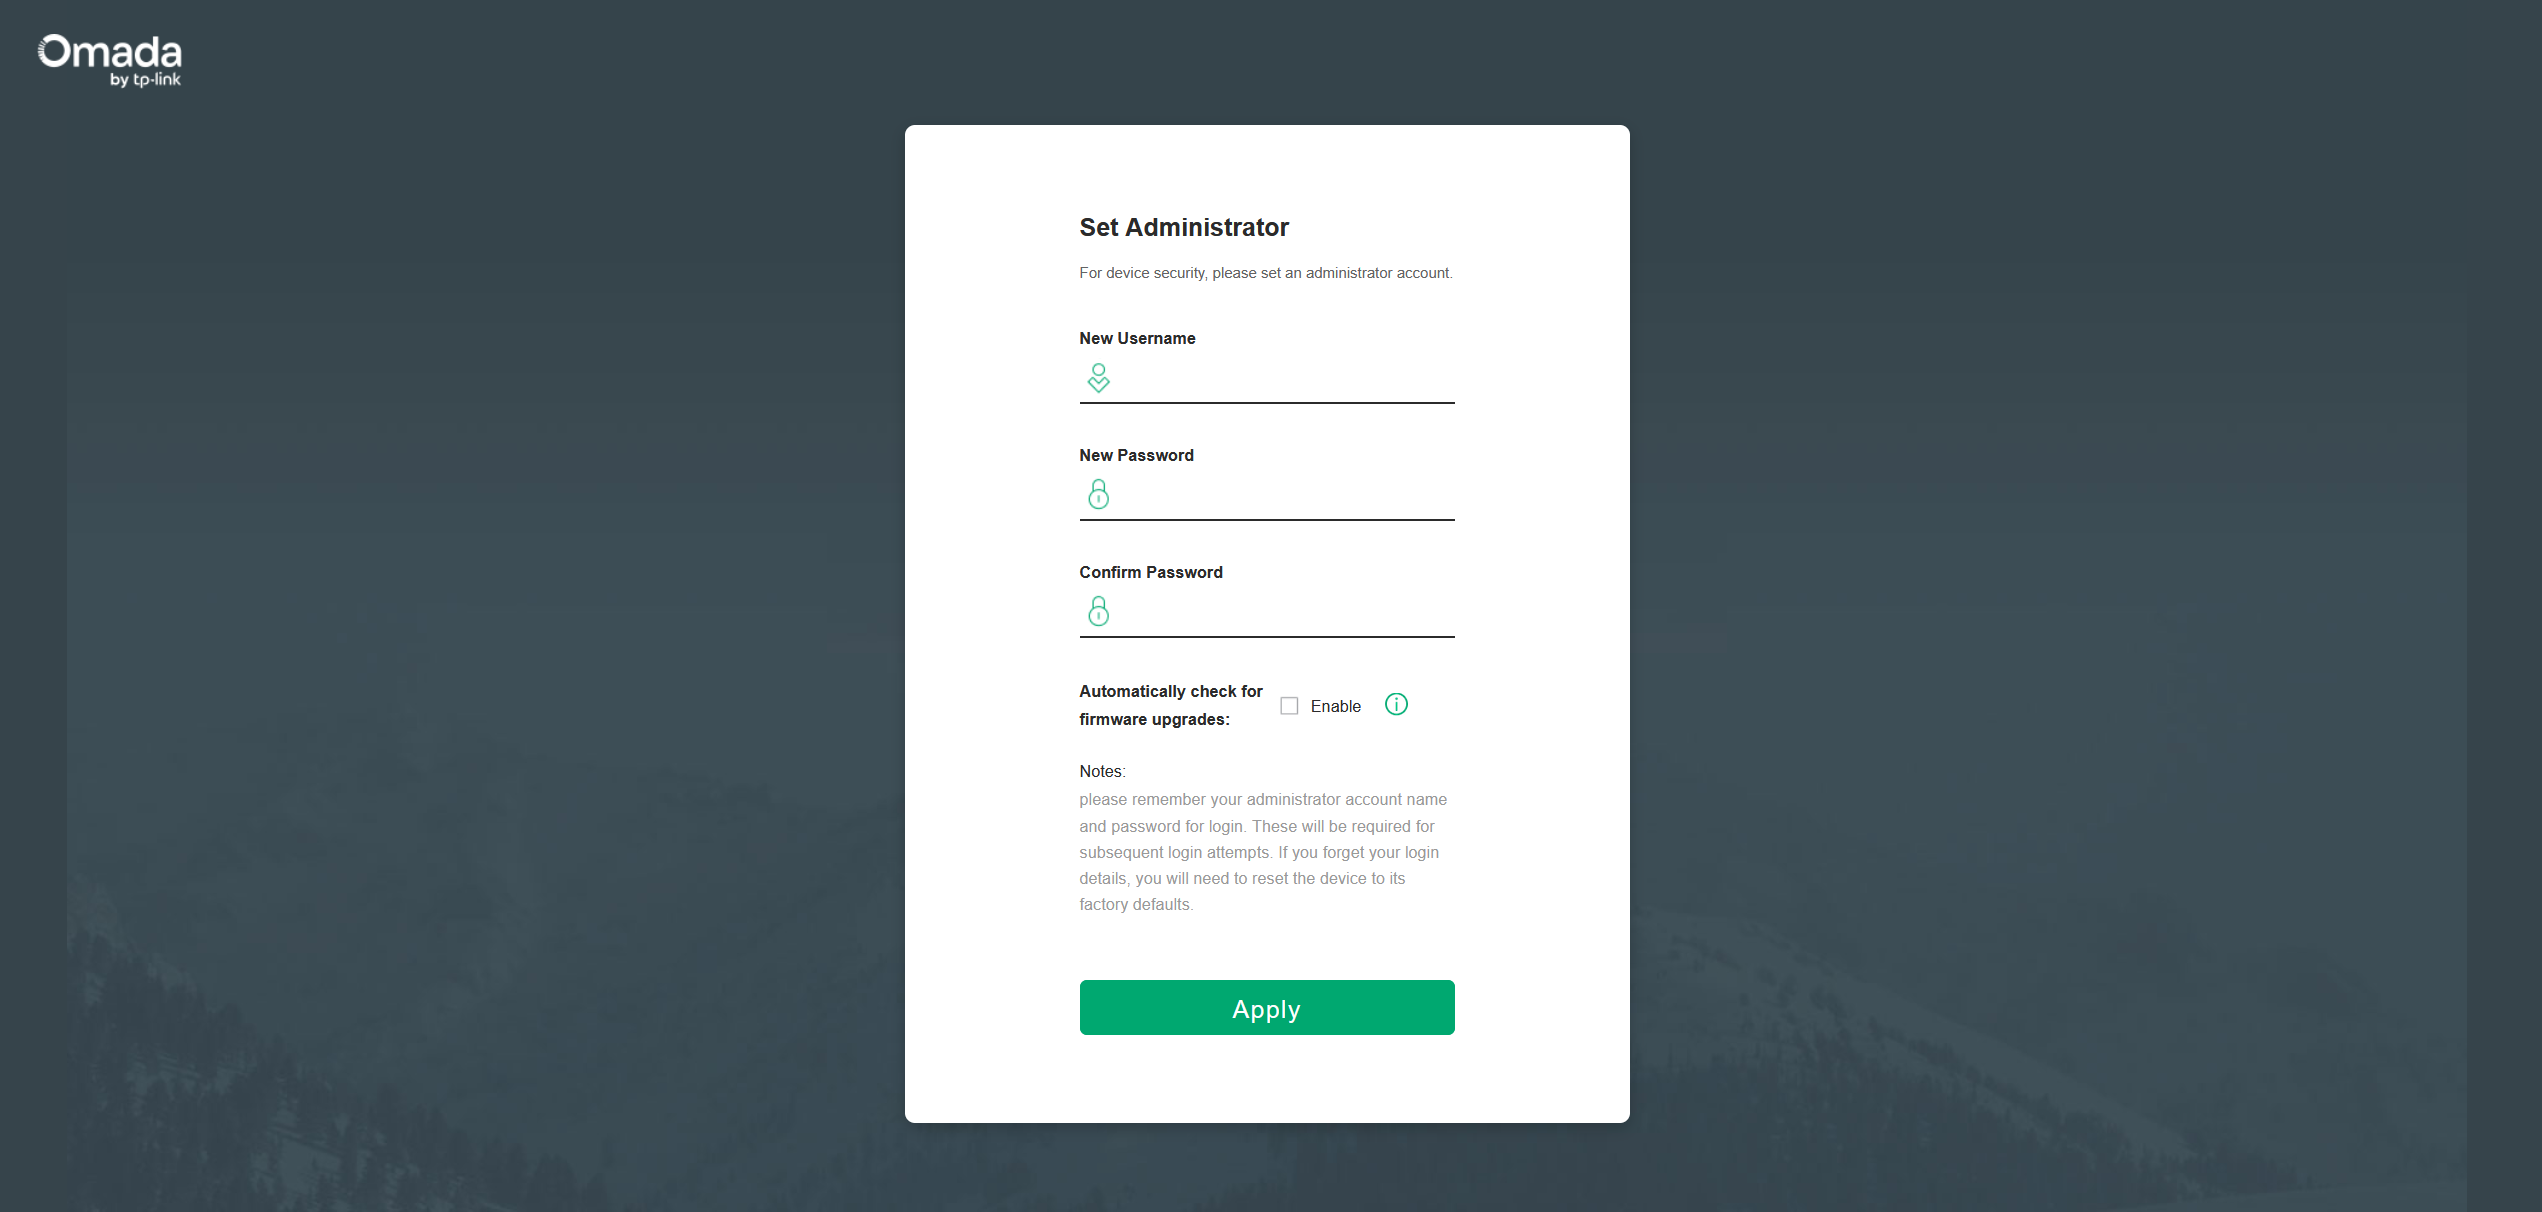
Note: If the IP is not known, it can be found by using the "Omada Discovery Utility".
- Access to the EasyRadius dashboard
- A computer that already has an EasyScep certificate (for example through Intune)
- An existing EasyRadius Client (for the shared secret)
- The switch has a default gateway. The switch must be able to reach EasyRadius on the internet. Look in the switch's IP settings and make sure the default gateway points to your router.
- You know your port layout. Write down which port goes to the router, which ports have access points, printers, or other devices without a certificate, and which port you manage the switch from. These ports must not have 802.1X enabled.
Safety net: Changes on the switch take effect immediately but are only kept after a reboot once you click Save (top right). Don't save until everything works. If you lock yourself out, unplug the switch's power and plug it back in to return to the last saved configuration (see You've locked yourself out of the switch).
Step 1: Add EasyRadius as the RADIUS server
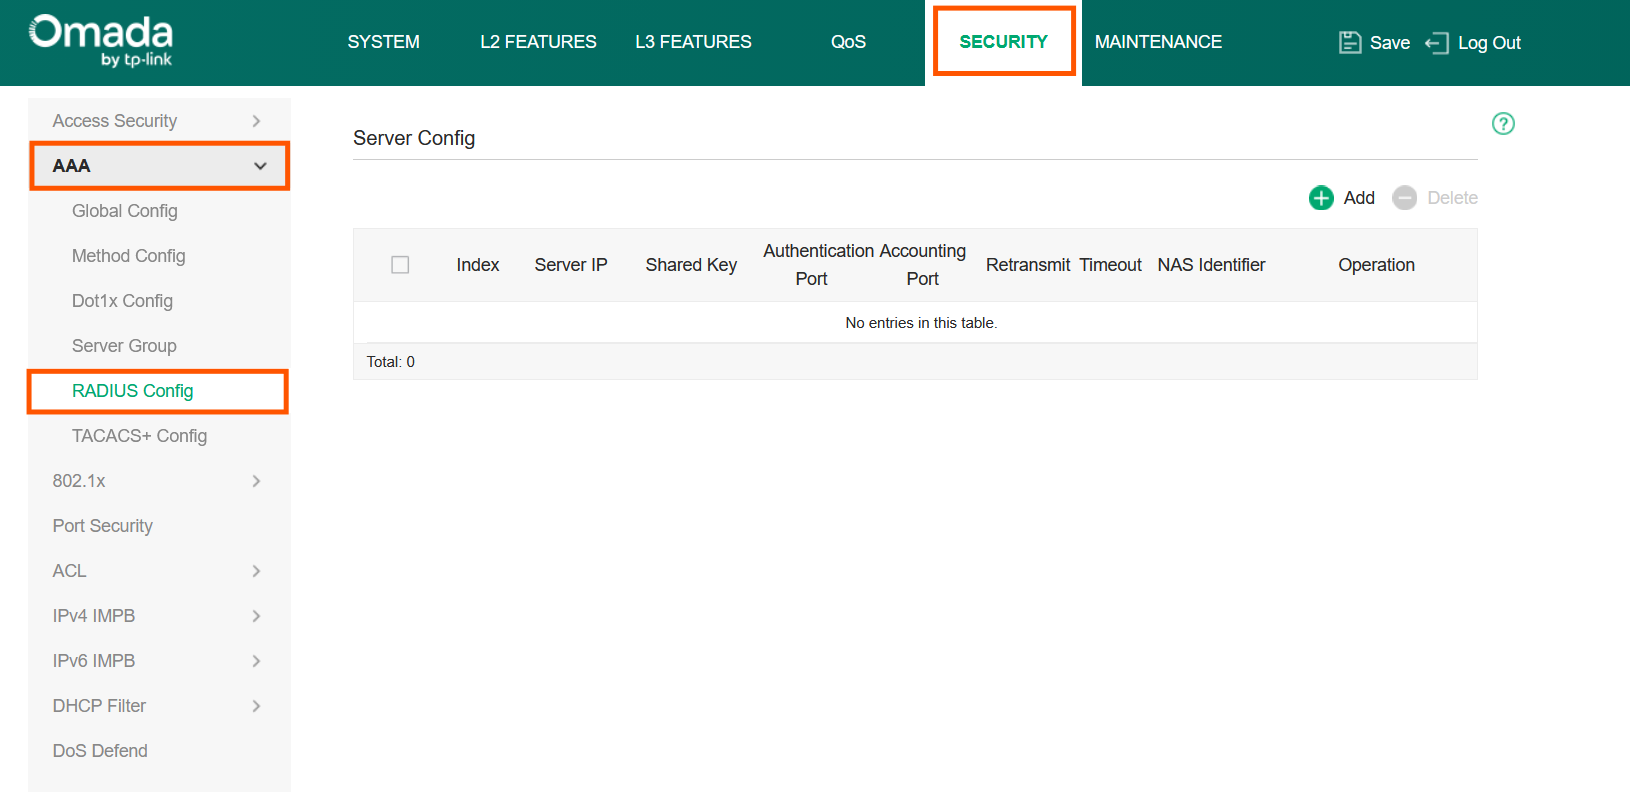
- In the switch's web interface, go to Security → AAA → RADIUS Config.
-
Click Add in the top right.
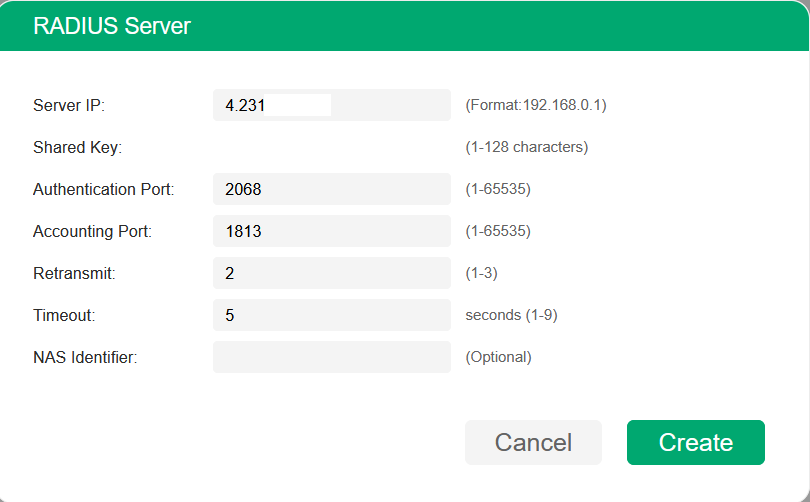
Field Value Server IP <EasyRadius server IP>(from the EasyRadius dashboard)Shared Key <shared secret>(from the EasyRadius client)Authentication Port <port>(from the EasyRadius dashboard; it's not always 1812)Accounting Port Leave at the default 1813(EasyRadius doesn't use accounting)Retransmit 2Timeout 5NAS Identifier Leave empty -
Click Create.
Step 2: Check the Server Group and Method List
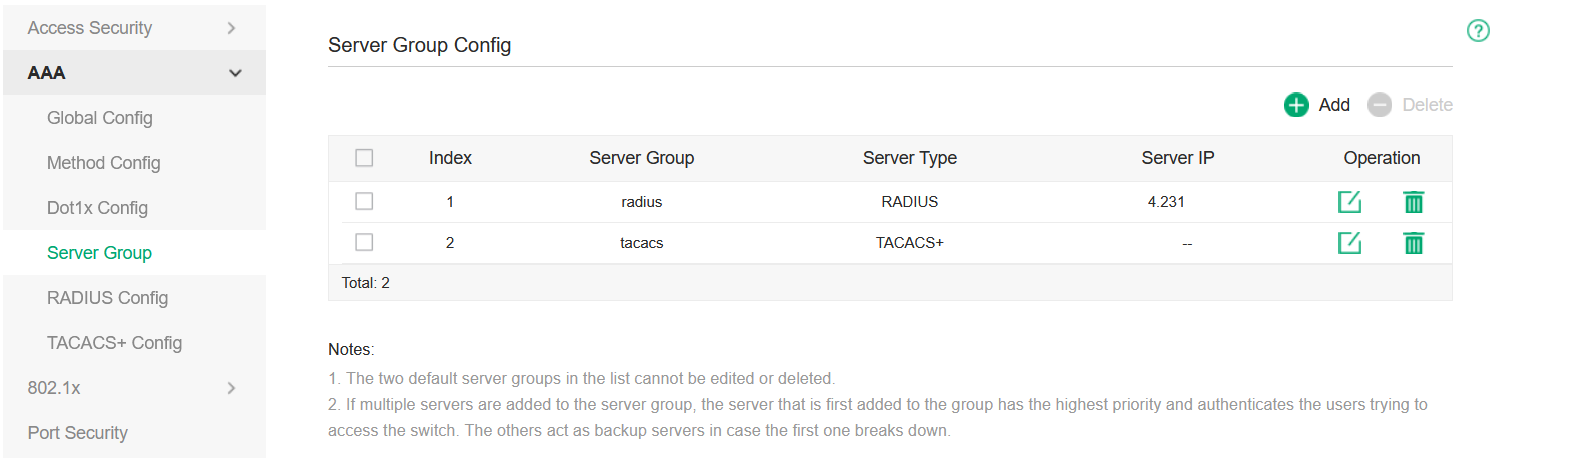
- Go to Security → AAA → Server Group and check that the server you just added appears in the radius group.
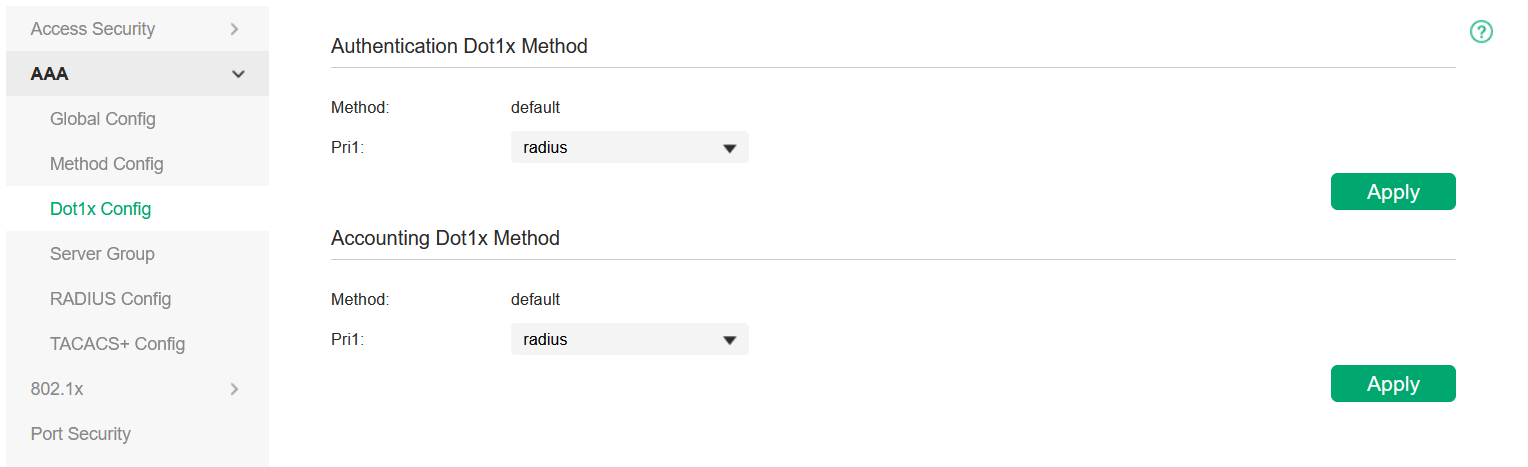
- Go to the Dot1x method list (under AAA → Method Config or AAA → Dot1x Config, depending on firmware) and check that default points to radius.
Step 3: Turn on 802.1X globally
- Go to Security → 802.1x → Global Config.
- Set:
Setting Value 802.1X Enable Authentication Method EAP Handshake Disable Accounting Disable (if present) -
Click Apply.
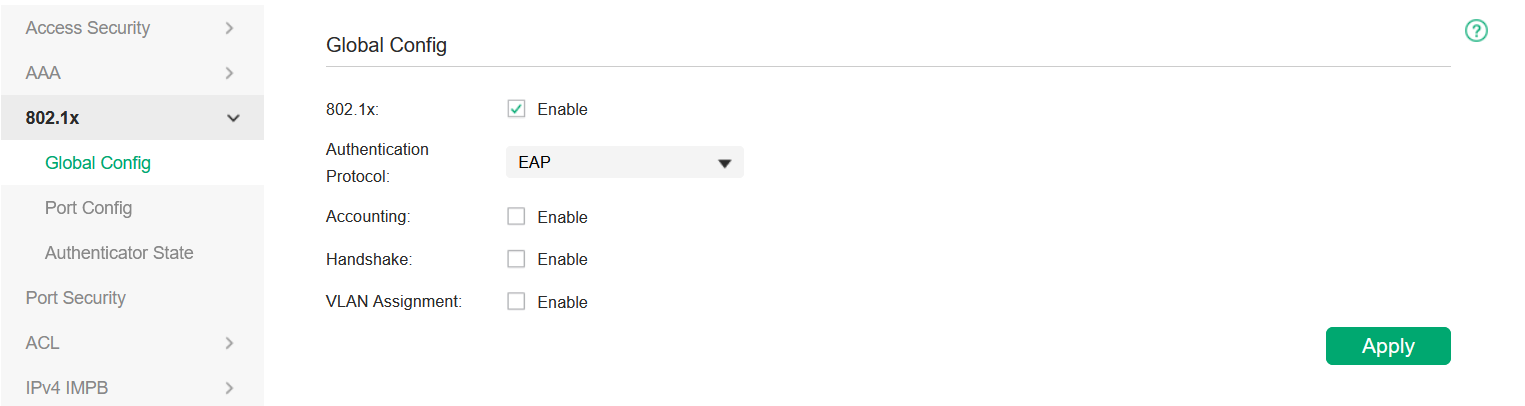
Important: Handshake must be off. Handshake is a TP-Link feature that only works with TP-Link's own 802.1X client. The built-in Windows client doesn't support it, so with Handshake on, the switch drops the computer and forces it to authenticate again about every minute (see Troubleshooting).
At this point it's safe to click Save, because no ports are protected yet.
Step 4: Protect the computer's port
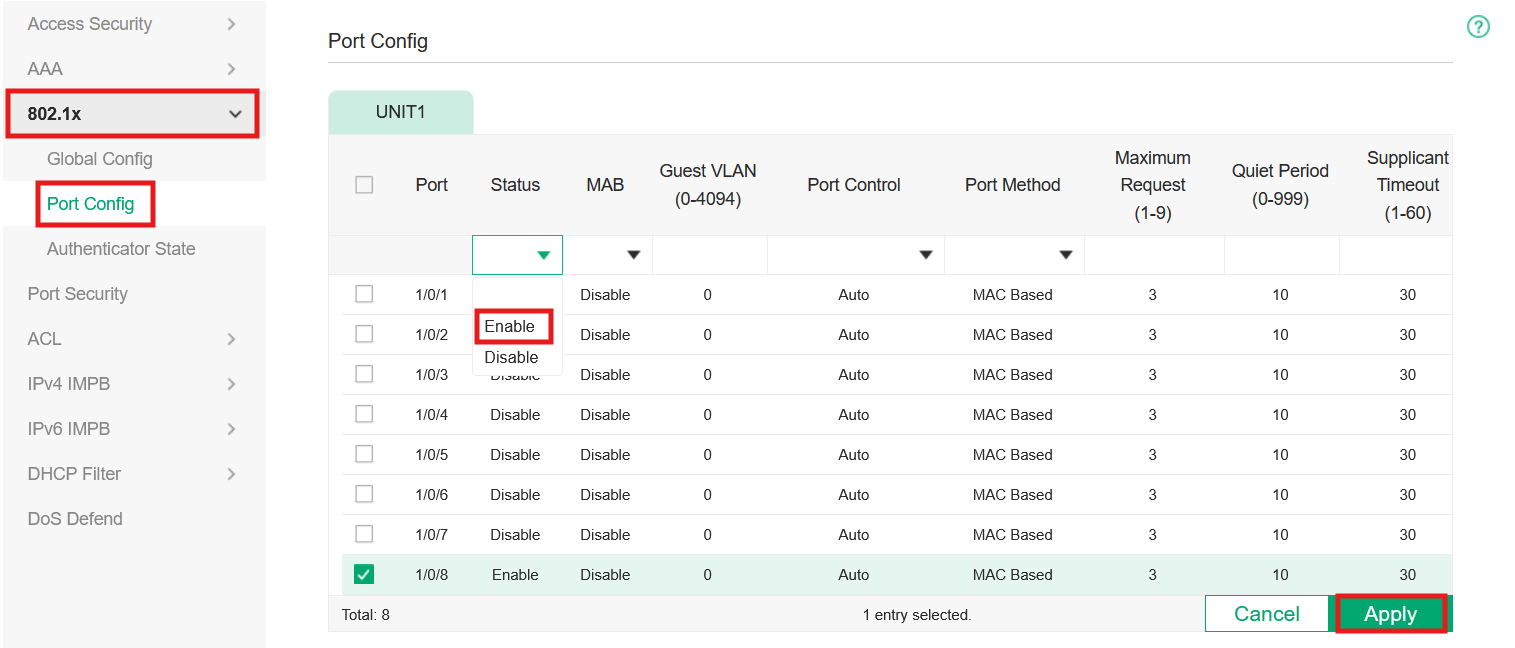
- Go to Security → 802.1x → Port Config.
- Tick only the port the computer with the certificate is connected to.
- Set Status to Enable. Leave the other columns at their defaults:
Column Value Status Enable MAB Disable Guest VLAN 0 Port Control Auto Port Method MAC Based -
Click Apply.
Warning: Never enable 802.1X on the router uplink, access point ports, printers, or the port you're managing the switch from. They'll be blocked immediately, and you may lose access to the switch. If that happens, see You've locked yourself out of the switch.
Step 5: Connect the computer
- If the computer has a wired network profile from Intune: plug in the cable. The computer authenticates automatically with its certificate.
- If there's no wired profile: set up 802.1X manually in Windows (see Manual setup in Windows under Troubleshooting).
- If Windows asks for a username and password: don't type one. See Windows asks you to sign in.
Note: A Wi-Fi profile from Intune does not cover Ethernet. A separate Wired network profile is needed (in Intune: Devices → Configuration → Create → Windows 10 and later → Templates → Wired network), using the same SCEP certificate and trusted root certificate as the Wi-Fi profile, with EAP type EAP-TLS.
Step 6: Verify and save
-
Check the EasyRadius log. You should see an accepted login for the computer.

If nothing shows up, see Nothing appears in the EasyRadius log. If the log shows
eap_peaporNo NT-Password, see The EasyRadius log shows eap_peap. -
On the switch, go to Security → 802.1x → Authenticator State and check that the port is authorized. If the port isn't listed, see Nothing appears under Authenticator State.
-
When everything works, click Save in the top right. To protect more ports, repeat Step 4 while managing the switch from a port that is not protected.
🎉 You're all set! Your device is now connected through the TpLink Omada SG2008P with EasyRadius authentication.
🛠️ Troubleshooting
Manual setup in Windows
Use this when the computer has no wired profile from Intune, or to test before the Intune profile arrives.
1. Start the Wired AutoConfig service
- Press Win + R, type
services.msc, and press Enter. - Find Wired AutoConfig, click Start, and set Startup type to Automatic.
2. Turn on 802.1X on the Ethernet adapter
- Open Control Panel → Network and Sharing Center → Change adapter settings.
- Right-click Ethernet → Properties and open the Authentication tab.
- Tick Enable IEEE 802.1X authentication.
-
Under network authentication method, choose Microsoft: Smart Card or other certificate. Do not choose Protected EAP (PEAP). That uses a password, and EasyRadius only accepts certificates.
5. Certificate settings
- Click Settings next to the authentication method.
- Choose Use a certificate on this computer.
- Under trusted root certificates, tick the same CA that your Wi-Fi uses to verify the EasyRadius server.
- Click OK.
6. Authentication mode
- Click Additional settings.
- Tick Specify authentication mode.
- Choose Computer authentication if the EasyScep certificate is issued to the device (most common with Intune). Otherwise choose User or computer authentication.
- Click OK on all windows.
5. Reconnect
Unplug the cable, wait a few seconds, and plug it back in.
You can check the setup with:
netsh lan show profiles
netsh lan show interfaces
The EAP type in the profile should say Microsoft: Smart Card or other certificate.
Common problems
-
Windows asks you to sign in with a username and password: Windows has no profile that tells it to use the certificate. Don't type a password, because it will always be rejected. Follow Manual setup in Windows above, or check that the Intune wired profile has reached the computer.
-
The EasyRadius log shows
eap_peap/mschap: FAILED: No NT-Password: The computer is using PEAP with a password instead of the certificate. Change the authentication method to Microsoft: Smart Card or other certificate (manually or in the Intune profile), then unplug and reconnect the cable. -
The computer authenticates again about every minute: Handshake is on in 802.1x → Global Config. Set it to Disable and click Apply (see Step 3).
-
Nothing appears in the EasyRadius log: The switch isn't reaching EasyRadius. Check the switch's default gateway, the server IP, the authentication port, and the shared key (Step 1). Also check that EasyRadius accepts requests from your site's public IP.
-
Nothing appears under Authenticator State on the switch: The switch hasn't registered the computer on an 802.1X port. Check that 802.1X is enabled in Global Config (Step 3), that Status is Enable on the right port in Port Config (Step 4), that the cable is in that port, and that Wired AutoConfig is running on the computer (Manual setup in Windows).
-
Authentication succeeds but there's no network: 802.1X is working. Look at VLAN and DHCP settings instead.
-
You've locked yourself out of the switch: If you haven't clicked Save: unplug the switch's power, wait 10 seconds, and plug it back in. It starts up with the last saved configuration. If you have saved: hold the Reset button on the front for about 5–10 seconds while the switch is on. This restores factory settings, including the IP address and password, so you'll have to set the switch up again.