On-boarding EasyScep using Azure Portal
EasyScep is a SaaS solution delivered thru the Microsoft Marketplace and provisioning is integrated into the Azure Portal.
Signing up
To get started, go to the EasyScep Azure Marketplace listing here or simply open the Azure Portal and type "EasyScep" in top search bar.
When you are in the Azure Portal, you will get this screen where you need to select which subscription and resource group you want to use for provisioning, this is primarily relevant for billing scope.
You will also need to name your EasyScep instance - we suggest a name like EasyScep-IntuneCA-Production to make it clear what it's for.
Important: Ensure that the selected plan and renewal setting is correct before continuing
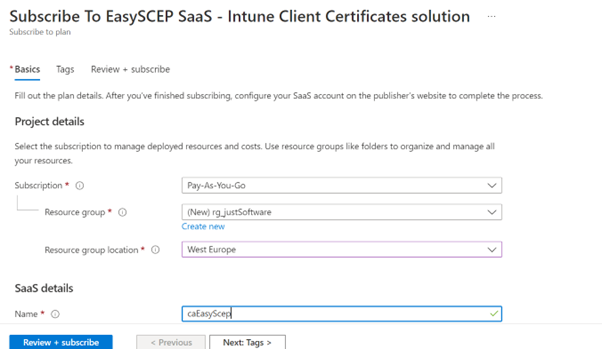
After you have filled in the required information, confirm your settings by clicking review + subscribe, now the service is getting provisioned. It typically takes less than 1 minute before you can continue with initial configuration.
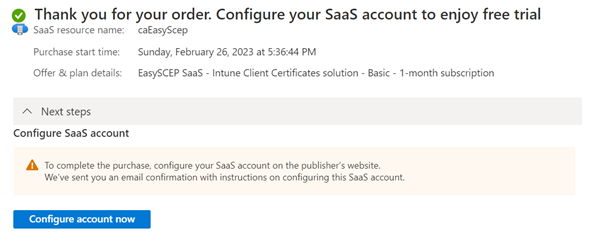
When you see the above screen, you can continue by clicking "Configure account now", this will bring you to the initial on-boarding wizard.
Completing the on-boarding wizard
You should now see the EasyScep on-boarding wizard welcome screen. Click "Next Step" to continue.

Fill in your Organization Name, contact email and select deployment region(s) for your EasyScep instance. If you have selected a high-availability plan, then you need to specify both primary and secondary region, and they must not be the same.

Fill in Root certificate name and optionally custom hostname(s) if needed. If you are in-doubt about custom hostname, just leave them empty.
Based on your organization name, a root certificate name is suggested, but edit as needed (e.g. put Test in the name if this is a test CA), but ensure it's a valid X509 certificate name.
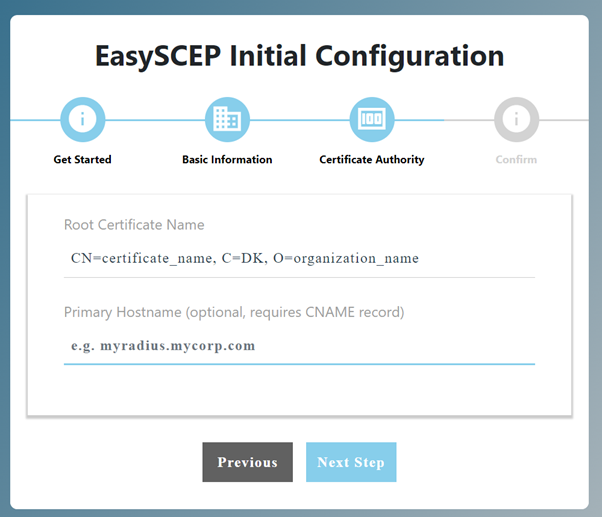
After you have filled in Root CA name and optional hostname(s), next step is simply a confirmation page. If everything looks correct, then just click "Deploy".
Deployment is now started, it will typically complete within a few minutes. You can close the page or wait until provision is completed. Page will refresh when provision is completed. If you close the window, you can always access it again from the Azure Portal, just search for "SaaS" and you can see all your SaaS subscriptions, incl. you EasyScep instances.
After deployment is completed, browser should redirect you to the EasyScep administration portal.
You can also access the EasyScep administration portal directly at https://portal.just-software.com at any time.
Verifying your setup
When you access your EasyScep instance in the administration portal, you will see the Status page, which shows you important information like status on endpoint status and Intune connectivity.
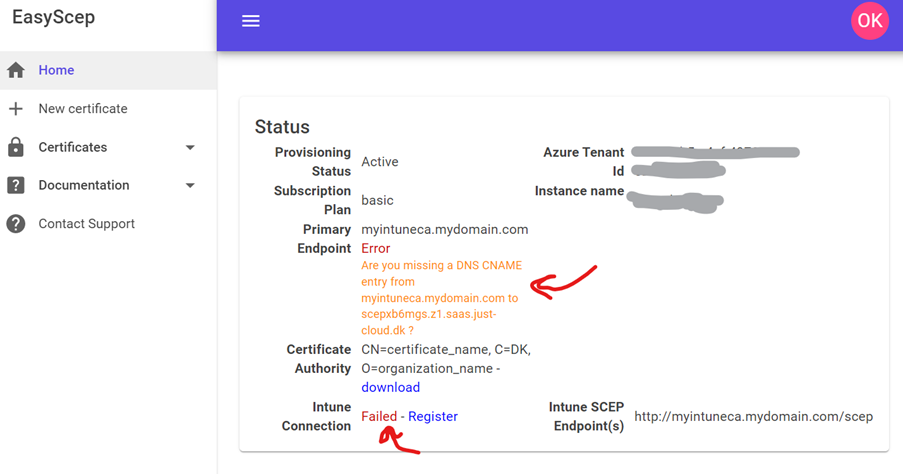
If this is your first EasyScep instance, then you need to grant EasyScep access to Intune for verifying certificate SCEP certificate requests and certificate revocations.
This is done by clicking the Register link next to the "Intune Connection: Failed".
You must do this with Global Administrator rights.
If you see endpoint errors, this is because you choose to use custom dns names. Add the missing CNAME record(s) displayed to you DNS zone. It normally takes from 5 to 60 minutes before DNS changes are detected.
Next steps
When everything is healthy on the status page, you can now continue with issue certificates. See our Intune Guide for instructions on how to do this.